Welcome to our July Q&A Roundup! This month, we’re taking a step back to revisit some fundamental yet essential topics in digital dentistry. Dr. Keun-Young Jang and Chae-yeon Lee, a dedicated member of his clinic staff, addressed common questions raised by the Medit user group, focusing on practical solutions to frequent technical issues.
Whether you’re dealing with persistent blue screen errors, struggling with scan body registration, or trying to perfect your scanning technique, this session offers clear, actionable advice to help you enhance your practice.
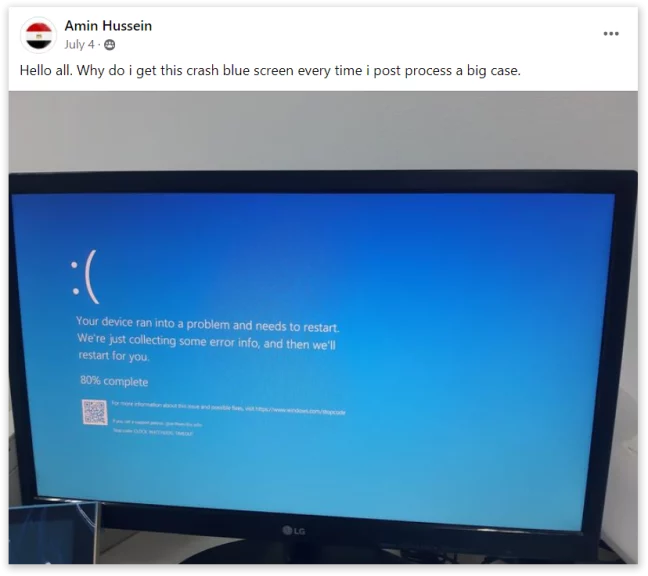
Q1. Why do I get a blue screen error every time I handle a big case?
Understanding the Causes of Blue Screen Errors

A recurring issue discussed in the Medit user group is the blue screen error, particularly when handling large cases. This error can lead to computer crashes, data loss, and significant frustration. Understanding the root causes and how to prevent them is crucial.
Key Factors Contributing to Blue Screen Errors
1. BIOS Updates:
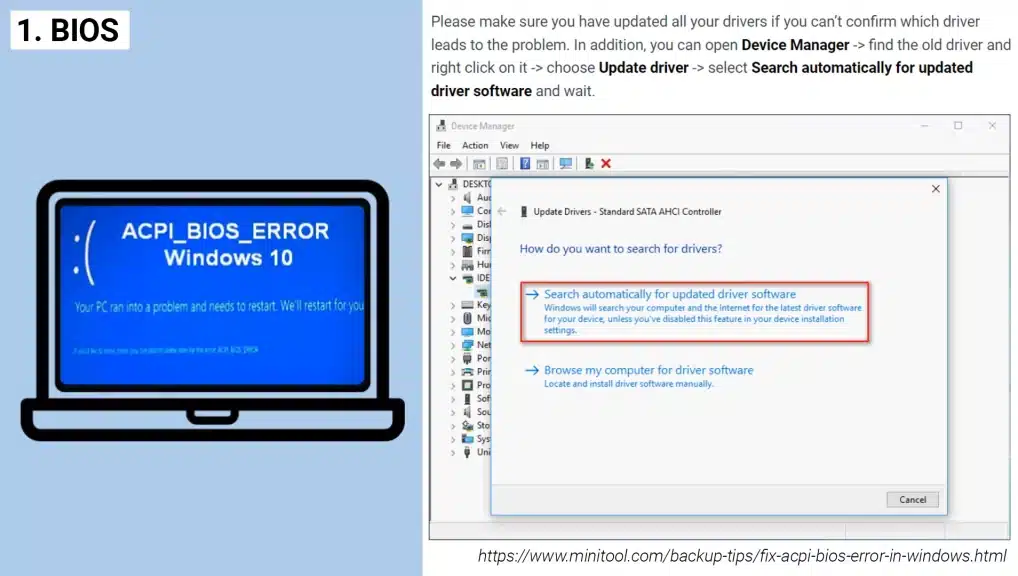
Ensure your BIOS is up-to-date. Older computers are more prone to blue screen errors because their hardware components, including BIOS, are outdated. Regularly check and update the BIOS to minimize the risk of crashes.
2. Graphics Card Maintenance:
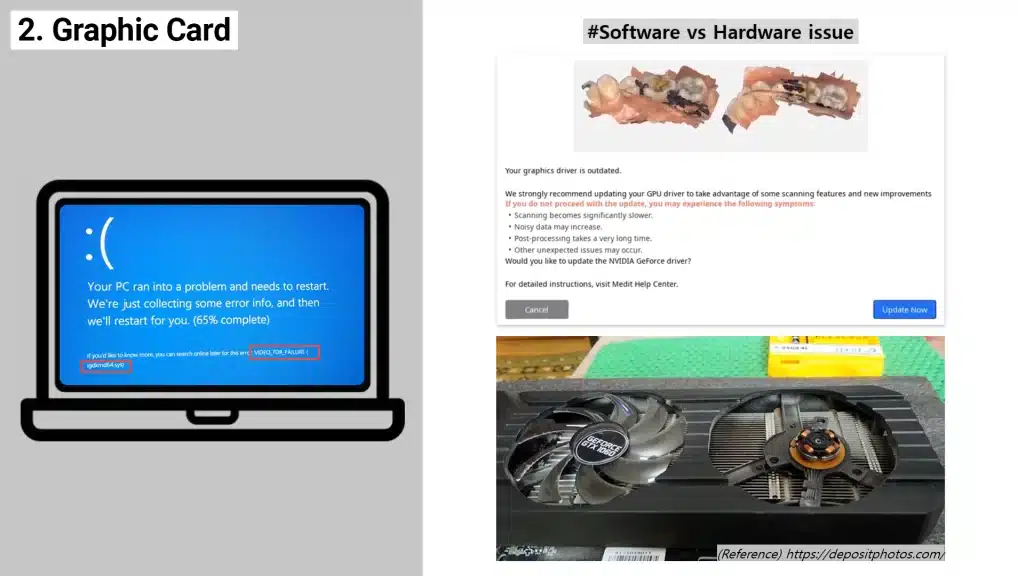
The graphics card is another critical component. Keeping your graphics card drivers updated and ensuring the card itself is in good condition is vital. Overheating or physical damage to the graphics card can cause frequent crashes.
3. CPU Cooling:

CPU overheating is common, especially during resource-intensive tasks like scanning full-arch cases. Monitoring CPU temperature and maintaining proper cooling can prevent blue screen errors.
4. RAM Compatibility:

Finally, ensure that all RAM modules in your system have matching clock speeds. Incompatible RAM can cause instability, leading to crashes.
Preventive Measures for Blue Screen Errors
Regular maintenance of your computer hardware is the best prevention against blue screen errors. By keeping your system in optimal condition, you can significantly reduce the occurrence of these frustrating interruptions.
Q2. What should I do if the scan body I am using is not registered in the Medit library?
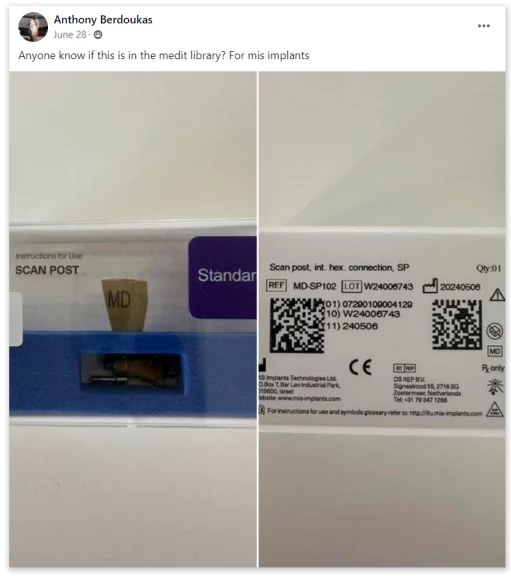
Another frequent topic in the Medit user group is the registration of scan bodies in the Medit software library. New users, in particular, often face difficulties when their scan body is not pre-registered in the Medit library. Here’s a simplified guide to help you through the process.
Registering Scan Bodies in the Medit Library: A Step-by-Step Guide
1. Check the Library:
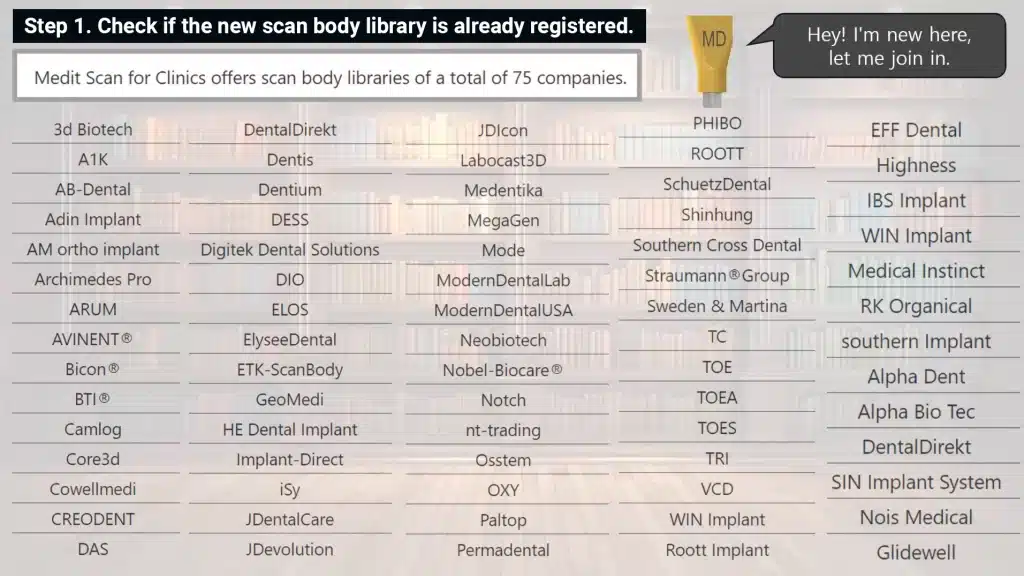
Before anything else, check if the scan body is already registered in the Medit software. Medit Scan for Clinics includes libraries for 75 companies, so there’s a good chance your scan body might be included. If not, you will need to manually register it.
2. Download the Scan body Library:
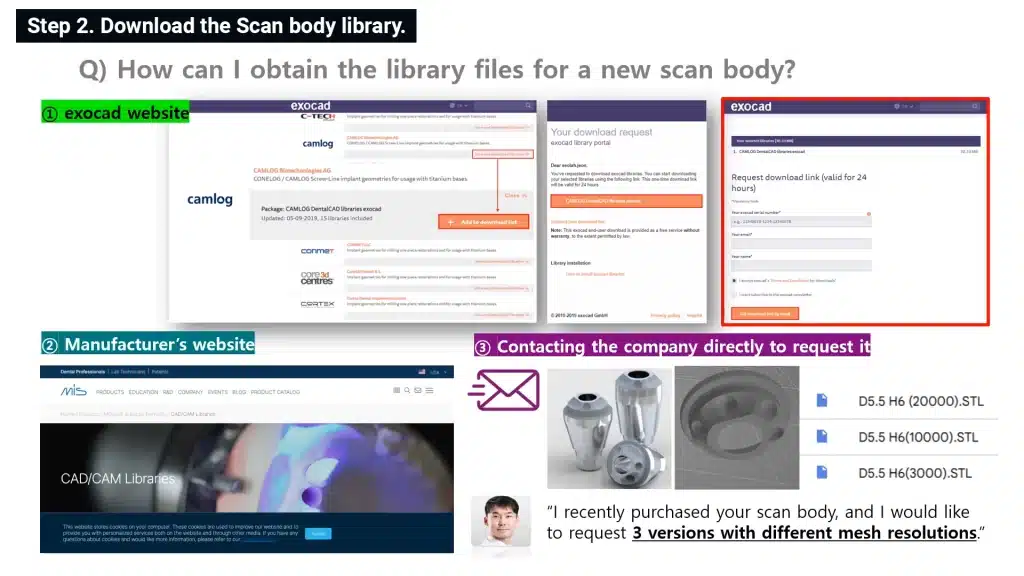
The easiest way to obtain a scan body library is to visit the manufacturer’s website. Most manufacturers provide downloadable libraries categorized by item. If you cannot find the library there, you can contact the manufacturer directly to request the files.
Adjust Mesh Density (Optional):
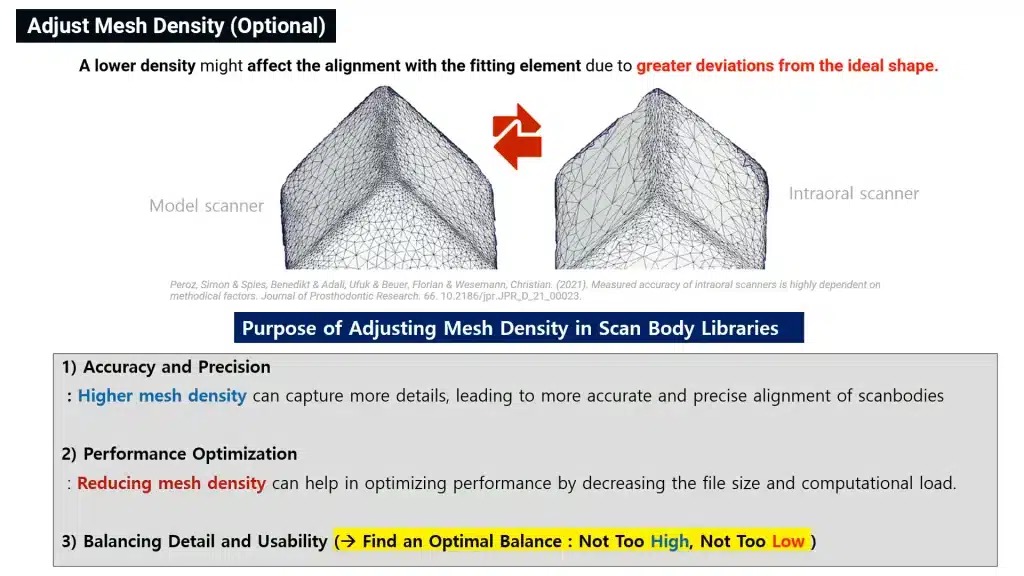
Another critical factor in achieving accurate alignment is ensuring that the mesh density of the scan body library matches the scanned data. Mismatched densities can lead to inaccuracies during the alignment process. Tools like Mesh Mixer or Medit Design allow you to adjust the mesh density of the scan body library to better match your scanning environment.
3. Register the Scan body in Medit:
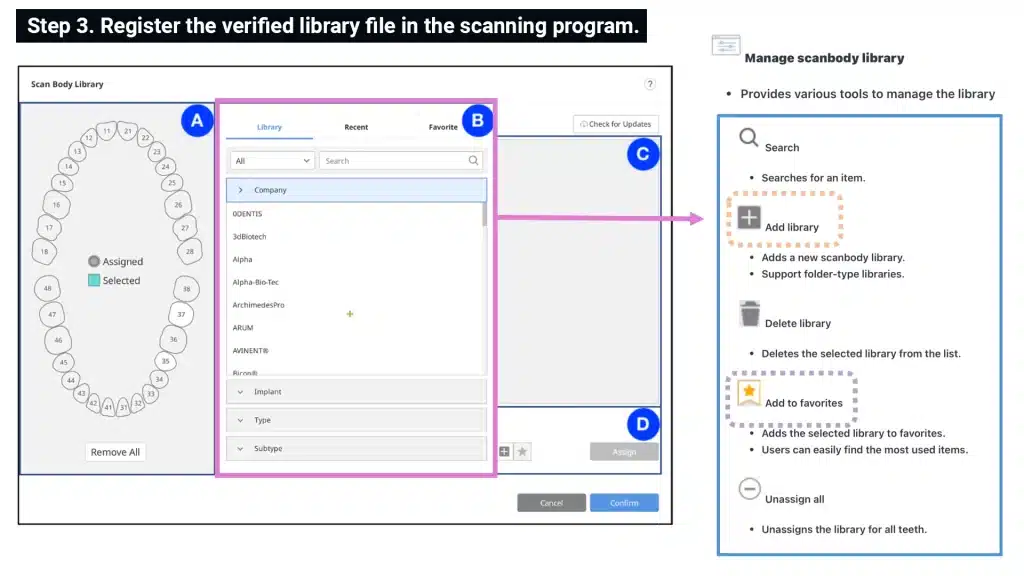
Once you have the library file, open the Medit software and navigate to the “Scan Body Library” section. Here, you can add the new library and even set frequently used scan bodies as favorites for quicker access.
Registering scan bodies is a straightforward process, but it’s crucial to follow each step carefully to ensure accurate scans and alignment.
Q3. I’m having trouble properly aligning a cylinderical-shaped scan body.
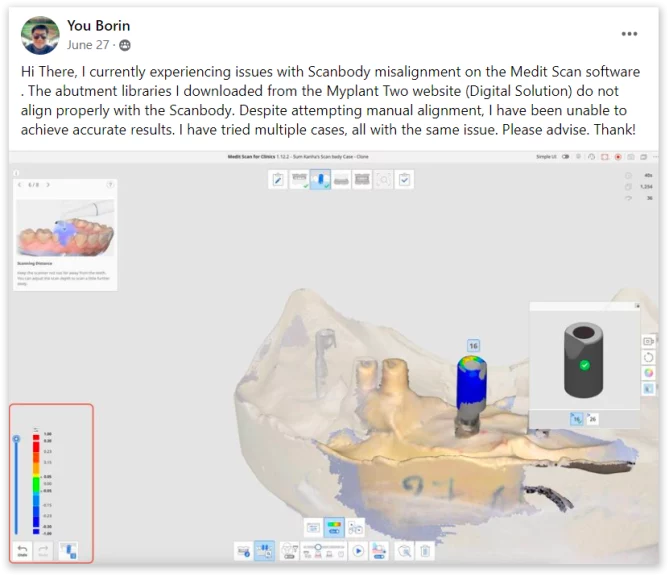
One issue that has garnered attention in the Medit user group is the difficulty in aligning cylindrical-shaped scan bodies. This problem often arises even after the scan body is successfully registered, leading to inaccurate results.
Challenges of Aligning Cylindrical Scan Bodies
Cylindrical scanbodies have fewer distinctive features, making it harder for the software to align them correctly. This is compounded when the scan body has a simple D-cut design, which offers limited reference points for alignment.
Best Practices for Accurate Alignment

Use Manual Alignment:
When automatic alignment fails, switch to manual alignment. A recommended method is the three-point alignment technique, where you select two points on the flat surface and one on the D-cut.
Strategic Scan body Selection:
In clinics, scanbodies with more complex shapes are preferred, as they provide more reference points for accurate alignment. However, if you must use a simple shape, the three-point method is your best bet.
Consistency in Alignment:

Ensure that the same points are used for alignment every time to maintain consistency and accuracy across different scans.
Q4. How can I accurately scan two closely positioned scan bodies?
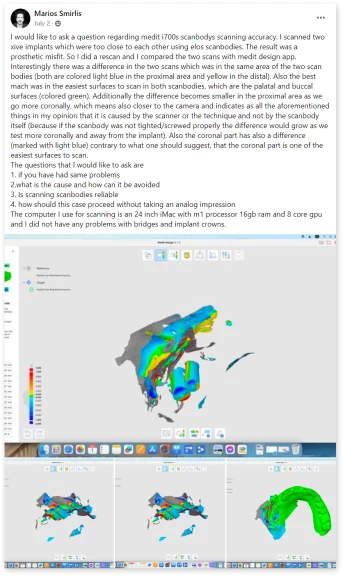
Scanning two scanbodies placed in close proximity poses unique challenges, often leading to misalignment and inaccuracies in the final prosthetic design.
Why Is This a Problem?
When scanbodies are too close to each other, the scanner may struggle to capture all necessary details, especially in tight spaces. Overlapping data or insufficient light passing through the gap can lead to errors.
Strategies for Accurate Scanning

Scan Sequentially:
Instead of scanning both scanbodies simultaneously, scan them one at a time. This reduces the risk of data overlap and ensures that each scan body is captured accurately.
Use the Lock Function:
After scanning the first scan body, lock the data before proceeding to the next. This prevents any potential interference from subsequent scans.
Consider Scan body Positioning:
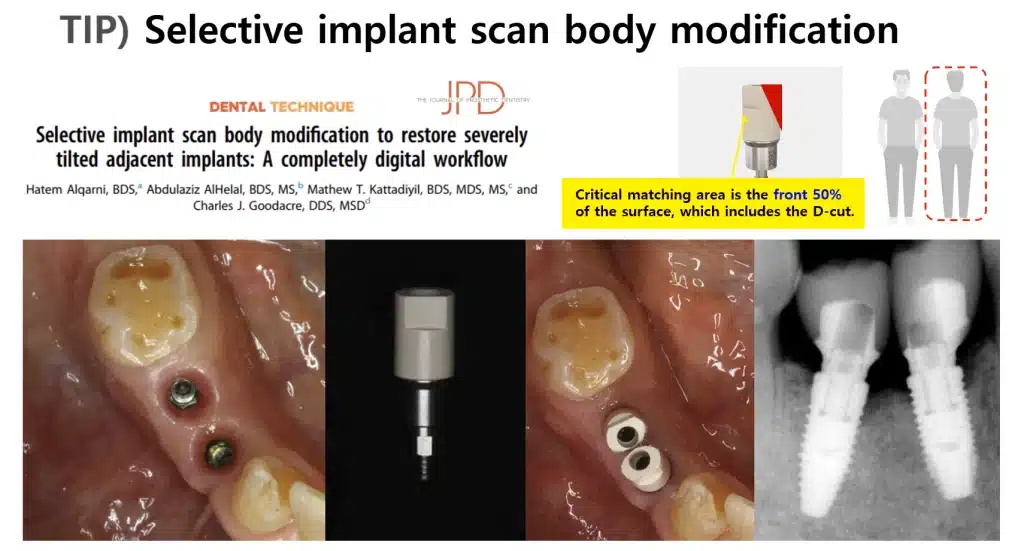
If possible, adjust the orientation of the scanbodies so that their D-cuts do not face each other directly. This minimizes confusion for the scanner and improves accuracy.
In more extreme cases, modifying the scan body’s shape or using a smaller diameter scan body may be necessary to achieve the best results.
The July Q&A session provided a comprehensive overview of key topics in digital dentistry, returning to the basics that are crucial for smooth operations in any practice. From understanding the causes of blue screen errors to mastering the registration and alignment of scan bodies, this session was packed with practical tips that can be immediately applied in your clinic.
Join us next month as we continue to explore and solve the challenges brought up by the Medit User Group, further refining our skills and improving our practices together!
Click here to view the June Q&A session.
Visit Medit Academy YouTube Channel for more educational content.
